Skill Level:
Crafting Time:
Technique(s):
Material(s):
Category:
Tag(s):
Share This Craft
Search Crafts
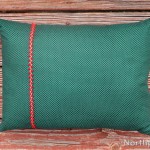
Rustic Circle Bunting

Here’s a different spin on bunting! These circles add a playful twist to your party decor. Hang them alone or with other strands of bunting above your buffet table, on the wall in your entryway, or as the backdrop in a DIY photo booth.
Supplies & Tools:

- Printable template (download here)
- 1 yard burlap (any color)
- 4 yards twine
- Scissors
- Sewing machine
- Thread to coordinate with burlap
- Tailor's chalk
- Drawsting threader
Directions:
- Print the template on cardstock and cut out circles. Decide what size circles you would like to use. We used a variety of sizes and alternating colors.
Note: Cut circles that range from 2.5–4.5". The circles will unravel if smaller than 2.5" and become floppy at 5". - You will need to cut 2 of each circle. We chose to have 15 circle segments on our bunting, so we cut 30 circles total. Trace circles onto burlap with tailor’s chalk and cut out.
Note: For fewer scissor snips, fold burlap in half, trace circles on one surface, and cut through both layers of fabric simultaneously. - Lay each pair of circles on table in the order in which they will hang.
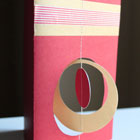
- Use sewing machine to sew a straight line through the center of each pair. After all circle pairs are sewn, trim thread.
- Next, sew another line through each pair that is about half an inch from the center line. (It doesn’t matter whether this line is above or below the center line.) Trim thread once finished. The ‘pocket’ created between these two lines is for the twine.
- Pull end of twine through the eye of the drawstring threader. Don’t cut the twine from the skein yet.
Note: If you don’t have a drawstring threader, you can tape the end of the twine to the end of a chopstick. If you have a difficult time pushing the chopstick through the layers of burlap, try sanding the tip of the chopstick. - Carefully push drawstring threader through the ‘pocket’ of each circle. Continue until all circles are strung on the twine.
- Once all circles are added, pull more twine through the bunting so that you have 24–30 inches of twine hanging from each either side. Cut the twine from the skein.
Note: We found it is helpful to have a second set of hands for this step since the bunting is so long. Have one person hold the twine that is attached to the drawstring theader. The other person should hold the circle on the opposite end of the bunting (near the skein of twine). - Remove the drawstring threader from the twine.
- Lay your bunting on a flat surface. Space each circle about 0.25" apart. Make sure each circle is positioned correctly—align the center seams.
- Now your bunting is ready to hang! Try hanging multiple strands of bunting; click here to learn how to make triangle and rectangle-shaped bunting.