Skill Level:
Crafting Time:
Technique(s):
Material(s):
Category:
Tag(s):
Share This Craft
Search Crafts
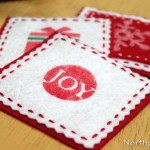
Decoupage Coasters

Decoupage is a great way to personalize items or even repurpose an old or perhaps unwanted object. In this article, we’ll use this technique to show you a couple of different ways to make coasters using paper. Read on to find instructions for making both reusable and disposable coasters.
Tile Coasters/Trivets

This suggestion came from Leanna, a friend of the elves. These coasters can be used year after year, making them an ideal choice as a gift idea. Use small tiles to make coasters or large tiles for trivets. Have fun making coasters with different materials: layer tissue paper; cut newspaper clippings from important events; use family photos or other memorabilia.
Supplies & Tools:

- Ceramic tiles
- Scrapbook paper
- Mod Podge
- Foam brush
- X-Acto
- Metal ruler
- Cutting mat
- Kraft paper
- Paper plate
- Clear spray paint
- Felt feet
Directions:
- Lay cutting mat on a flat surface.
- Measure and cut scrapbook paper to same size as tiles.
- Protect work surface with kraft paper.
- Pour a dollop of Mod Podge onto plate.
- Using foam brush, apply Mod Podge to top side of the tile.

- Put scrapbook square on top of tile and gently press out any air bubbles.
- Repeat for remaining tiles.
- Let dry completely.
- Trim excess paper with X-Acto, if needed.
- Turn coaster over and press felt feet into each corner. If the felt doesn’t come with adhesive backing, use hot glue to stick felt to the coaster.
Note: You can buy felt feet at a hardware store, or simply cut small squares from scrap felt.")
- To seal the coasters and make them water-resistant, use clear spray paint to seal the coasters. We used Krylon Clear Satin Spray.
- Take kraft paper, coasters, spray paint and go to a well-ventilated area.
- Follow manufacturer’s instructions for using the spray.
- Apply 1–2 coats of paint on coasters. Allow to dry.
Idea from the Elves:
- Tie the set together with a beautiful satin ribbon, and give as a gift.

Disposable Coasters (One-Time Use)

For these disposable coasters, we reused some mat board from a discarded picture frame. If you don’t have mat board, you can try using any kind of thick board, such as a cereal box or a gift box. Inexpensive and easy, these are perfect for a Christmas gathering or a dinner party.
Supplies & Tools:

- Mat board
- Scrapbook paper
- Pencil
- Mod Podge
- Foam Brush
- X-Acto
- Metal ruler
- Cutting mat
- Kraft paper or newspaper
- Paper plate
- Clear spray paint
- Optional: fine glitter
Directions:
- Lay cutting mat on a flat surface.
- Lay mat board on cutting mat.
- Measure and cut mat board into 4" squares.

- Measure and cut scrapbook paper into 4" squares.

- Lay kraft paper on flat surface. Set out the mat board squares and the scrapbook squares.
- Pour a dollop of Mod Podge onto plate.
- Using foam brush, apply Mod Podge onto one side of the mat square.

- Put scrapbook paper on top of mat board and gently press out any air bubbles.
- Repeat for remaining coasters.
- Trim excess paper with X-Acto, if needed.

- Let dry completely.
Seal the Coasters:
(Skip these steps if you intend to use coasters only once.)
- Use clear spray paint to seal the coasters. We used Krylon Clear Satin Spray.
- Take kraft paper, coasters, spray paint and go to a well-ventilated area.
- Use kraft paper to protect your work/spray area.
- Follow manufacturer’s instructions for using the spray.
- Apply 1–2 coats of paint on coasters. Allow to dry.
Note: We tried using Outdoor Mod Podge as a sealer for these coasters, but after drying for several weeks (long after the recommended cure time) they were still tacky to touch, and stuck to any surface it came in contact with (table, cup, themselves when stacked together, etc.). Therefore, outdoor Mod Podge is necessary for this project, and you can surely use regular Mod Podge to glue paper to the board.
Ideas from the Elves:
Paper Alternatives/Memorabilia Suggestions
- Photocopy dictionary pages, and enlarge words of your choice. Suggestions: Love, Family, Friend, Joy, Hope, Christmas, etc.
- Type name meanings on paper.
- Write a small hand-written note. “I love you” “Remember when we…”
- Newspaper clippings of a memorable article such as a birth/wedding announcement, sports event (sports fans, anyone?)
- Photo or photo collage
- Sheet music
Tissue Paper
- Cut tissue paper into desired shapes and glue tissue to coaster, one layer at a time. Smooth out any air bubbles, but be very careful because the tissue tears easily. Seal with clear spray paint.
Note: If you add glitter while the Mod Podge is wet, wait until the coaster is dry before you shake off the excess glitter. Notice the smear of glitter on ours…
Cardboard Coasters
- These are so easy and fast to make. Just cut 4" squares from a cardboard box or cereal box. This is a great idea for informal gathering such as a game night or potluck dinner. Provide your guests with markers so they can enjoy decorating (ok, doodling) on their coasters. Maybe make a friendly competition of it and give a door prize to the best looking coaster.