Skill Level:
Crafting Time:
Material(s):
Beads
Buttons
Candles
Fabric
Pinecones & Sticks
Ribbon
Category:
Tag(s):
Share This Craft
Search Crafts
Easy Candle Embellishments

Doesn’t everyone love candles? They are warm, inviting, and make a space feel cozy. When shopping for candles, the fancier candles can get pricey, so why not decorate your own? You can have the satisfaction of making something yourself and, at the same time, giving a unique handmade gift to a loved one. You can also make a set of similar designs and group together as a table centerpiece. The possibilities are endless when it comes to decorating and embellishing candles, so here are a few ideas.
Felt Flowers
Glue a wide ribbon around a pillar candle and then glue a handmade poinsettia in the center.

Instead of ribbon, you could use scrapbook paper.

Glitter & Garland
Add glitter directly to the candle. Use tape to mark off the areas where you want to put glue, so the rest of the candle doesn’t get messy. Apply glue to the candle. (We used tacky glue.) Sprinkle glitter all around the candle and let dry completely. While it is drying, make a mini rose garland. Wrap the rose garland around the candle and use hot glue to secure in place, if necessary.

Cute as a Button

Glue buttons to a strand of ribbon and fit around a candle. We used a mini hot glue gun (low temp) to glue the ribbon to the candle. Use any assortment of buttons that you like!

All About Twigs
Cover a candle with small twigs for a touch of nature.

We glued the sticks onto a piece of fabric, and then attached the fabric to the candle. To ensure that the sticks/fabric will curve around the candle nicely, wrap the fabric around a jar while you glue the sticks on.

You may have spaces between the twigs; that’s okay. Just keep adding twigs until you are happy with how it looks. Fit the fabric around the candle and trim as necessary. Then glue the fabric to the candle. The glue will soften the wax, so be careful not to pull the fabric too hard as you wrap it around. In addition to the glue, you can use artist tape to hold the end down while you wrap the candle.

Note: You may notice lots of hot glue strings; just use a hair dryer to make those strings disappear.

Knotted Up
Tie several pieces of twine around the candle. Simply tie the twine in a regular knot, and the ends will look a little wonky. Use this to your advantage and trim the tails at different lengths to give it a rustic look.

Rustic Texture
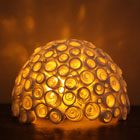
Wrap the candle with burlap, and then use a hair dryer to melt the outside of the candle. (Be sure to protect your work area with several sheets of newspaper.) Work in small sections at a time, melting one area and then pressing the burlap into the wax. Continue working your way around the candle. After the wax has hardened, peel the burlap off the candle.

To highlight the new, funky texture of the candle, lightly brush the surface with paint. We used copper metallic paint and a foam brush. Don’t get too much paint on the brush because you don’t want it to fill in the crevices—just lightly brush the surface.
See how the candle glows through the burlap motif–lovely!

Idea from the Elves:
- Have fun experimenting with different materials, textures and paints such as:
- Corrugated cardboard
- Mesh
- Wire
- Yarn
- Pine needles
Sweet Beads
Ribbon + glue + microbeads = Beaded ribbon! These beads are not really beads, but are tiny microbeads that do not have a hole. First measure a piece a ribbon that is a 2" longer than the circumference of the candle. Tape down the ends of the ribbon to your work surface so that you have a straight line where the glue stops. (You might want to work over a paper plate to make cleanup easier.) Apply a generous amount of tacky glue to coat the ribbon (leave the last 0.5" of each end uncoated.) Carefully pour beads over the ribbon and gently press the beads into the glue. After the ribbon is completely dry, use hot glue to attach to candle.

Make another beaded ribbon with a contrasting color and make a bow.

Fray in a Roundabout Way
Cut a piece of fabric on the bias (diagonal to the grain). Ours is about 1.5" x 11". Pull on threads until the edges are frayed. Use hot glue or double-sided tape to attach the fabric to the candle. Embellish however you like.

For this candle, we cut 3 different sized circles and frayed the edges of each one. Stack the circles together, sew a button in the center, and then glue it to the candle.