Skill Level:
Crafting Time:
Technique(s):
Material(s):
Category:
Share This Craft
Search Crafts
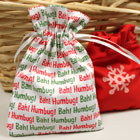
Mini Santa Sack

This cute little bag imitates Santa’s gift sack and is the perfect size for favors or small gifts. We made ours from classic holiday red fabric with black satin ribbon, complete with miniature bells. Jingle the bells, for Christmas is coming!
Supplies & Tools:

- Printable template (download here)
- 0.5 yard fabric
- Thread to coordinate with fabric
- Thin ribbon (1/8" wide)
- Pen
- Ruler
- Scissors
- Pins
- Sewing machine
- Miniature bells
Directions:
- Print out template and cut out pattern on page 1. Set aside diagrams (template pages 2 & 3) for future reference.
- Pin template to fabric and cut out along all solid lines. (Fabric should measure 8.5" wide x 6" long.)
- Lay fabric on work surface with wrong side facing up.
- Fold the flaps (which are above the incision) over and pin in place. See .pdf template for diagrams.
- Using sewing machine, each sew flap in place. Trim excess thread.
- Lay fabric on work surface, wrong side up.
- Fold top edge down 0.75". Use pins to secure in place.
- Sew a line about 0.25" inside the edge of the fabric. Remove pins and set aside. Cut excess thread.
- Place fabric right side up on work surface. Fold in half, bringing the left side over to the right. (Once folded, it should measure 4.25" wide x 5.25" long)
- Sew along the raw edges. Cut excess thread.
- Turn right side out.
- Cut a piece of ribbon that is 16–17" long.
- Use a small safety pin (or a needle with a large eye) and thread it through the space created. Pass through the bag two times. Remove safety pin and set aside.
- Add bells to the ribbon and tie ends in a knot.
- Pull on the knot to close the bag.

Idea from the Elves:
- If desired, stamp a design on the bag:
- Open bag and lay flat on work surface. Place a piece of scrap paper inside the bag so that the paint does not bleed through.
- Using foam brush, lightly apply a coat of paint on the foam stamp.
- Carefully lay the stamp onto bag, press firmly.
- Remove the stamp and set aside.
- Let bag dry completely.
- Repeat on the reverse side if desired.
- Remove paper from inside the bag.
Companion Craft for Kids:
We made a kid version of this craft, so parents & children can make red Santa sacks together! It is tailored for mini-me’s and is perfect for little crafters. Click here for the instructions.

Santa’s Sack