Skill Level:
Crafting Time:
Material(s):
Category:
Tag(s):
Share This Craft
Search Crafts
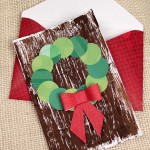
Peek-a-Boo Present

Remember those lift-the-flap books from your childhood? This peek-a-boo card reminds us of those beloved books. You can put any image inside the gift box—a family photo, image from a magazine, photo that hints at a present, or whatever you like!
Supplies & Tools:

- Printable template (download here)
- Scrapbook paper
- White paper
- Chipboard
- Photo
- Red foam
- Glitter ribbon
- Rubber cement
- Mini hot glue gun & glue sticks
- Cutting mat
- X-Acto
- Ruler
- Pencil
Directions:
- Print the template and cut out.
- Trace template onto red foam and cut out.
- Take ribbon and begin gluing ribbon (with hot glue gun) at the bottom of the box. Bring ribbon the top of the box and glue in place. Do not cut the ribbon.

- Fold the ribbon back, forming a small loop. Glue in place. You only need a small amount of glue at the base of the loop.

- Turn box over, and fold ribbon to the left. Glue in place by putting a small amount of glue in the crease.

- Form a loop and glue to box.

- Fold ribbon to the right and glue in place.

- Form a loop and glue to box.

- Cut ribbon and set box aside.

- Working over a cutting mat, measure and cut a piece of chipboard that is 6" x 8".
- Score the board using X-Acto and metal ruler. Then fold in half forming a 6" x 4" card.
- Measure and cut a 6" x 8.25" piece of scrapbook paper.
- Using rubber cement, glue scrapbook paper to the front of card.

- Flip card over. Fold scrapbook paper over and glue in place.

- Place card on cutting mat and trim excess paper using X-Acto.

- Place template piece in the center of the front of the card.
- Lightly trace the template with pencil.

- Unfold card and place on cutting mat.
- Use ruler and X-Acto to cut along the top three sides of the box. DO NOT CUT THE BOTTOM LINE!

- Turn card over and use pencil to mark where the bottom line is. (See the arrows in the image below.)

- Use ruler to connect these marks and lightly score with X-Acto.
- Bend the flap forward.


- Turn card over so that the scrapbook paper is facing up. Use hot glue to attach the present to the flap.

- Open the card.
- Apply rubber cement around the flap. Press photo down. (Trim photo as needed prior to gluing down.)

- Measure and cut a piece of white paper that is 6" x 8".
- Fold in half so that is forms a 6" x 4" card.
- Glue to the inside of card. Trim edges if necessary.
- Add words to card, such as “Open before Christmas!”

Elfy Hint:
- Typically, a 4" x 6" card would fit in an A4 envelope, but because of the chipboard and foam, you may want to put this card into a larger envelope like this A6 envelope at envelopes.com.