Skill Level:
Crafting Time:
Technique(s):
Material(s):
Category:
Artificial Floral Arranging 101
Share This Craft
Search Crafts
Artificial Floral Arranging 101

Incorporating real or artificial flowers into your Christmas decor livens up the space and adds a warm touch. Available in many colors and styles—glittered, flocked, frosted, or velveted—you can find artificial flowers to fit any holiday theme. The magic of fake flowers is that you can easily create whimsical designs that you would not be able to achieve with fresh flowers. Plus, artificial flowers won’t wilt and don’t need any upkeep, so you can enjoy them all season long and for years to come.
This article provides a helpful overview on working with artificial flowers. Let’s begin by reviewing the tools you will need.
Tools
If this is your first time working with artificial flowers, there are a few basic tools you will need to get started. You probably already have these items in your craft closet or toolbox.
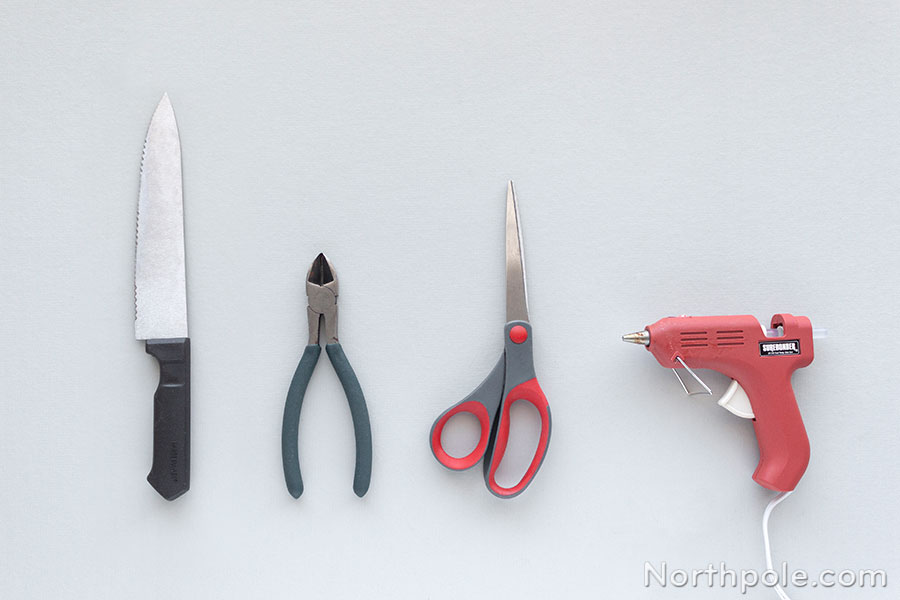
Sharp knife – You need a knife to cut floral foam to fit your container. A chef’s knife works well; just make sure that it is sharp to reduce the amount of foam dust released. (You don’t want to inhale that stuff—yuck!)
Wire cutters – You’ll need wire cutters to trim the stems of your fake flowers, foliage, and other decorative elements. Your wire cutters might be the single most important tool when working with artificial flowers, so don’t skimp on them. A cheap pair won’t cut well and may even get damaged from the wire within the flower stems.
Scissors – It’s always a good idea to keep scissors on hand, as you’ll need them to remove tags from flowers, to cut ribbon, etc.
Hot glue gun (or glue skillet) – Hot glue is essential for securing stems in the foam. If this is your first foray into floral arranging, a hot glue gun will do just fine. If you fall in love with floral arranging and plan on making lots of arrangements, you may want to upgrade to an electric glue skillet. With a skillet, you can easily dip stems in hot glue, allowing you to work faster and with more ease.
Supplies
Here are the materials that you will need to bring your idea to life.
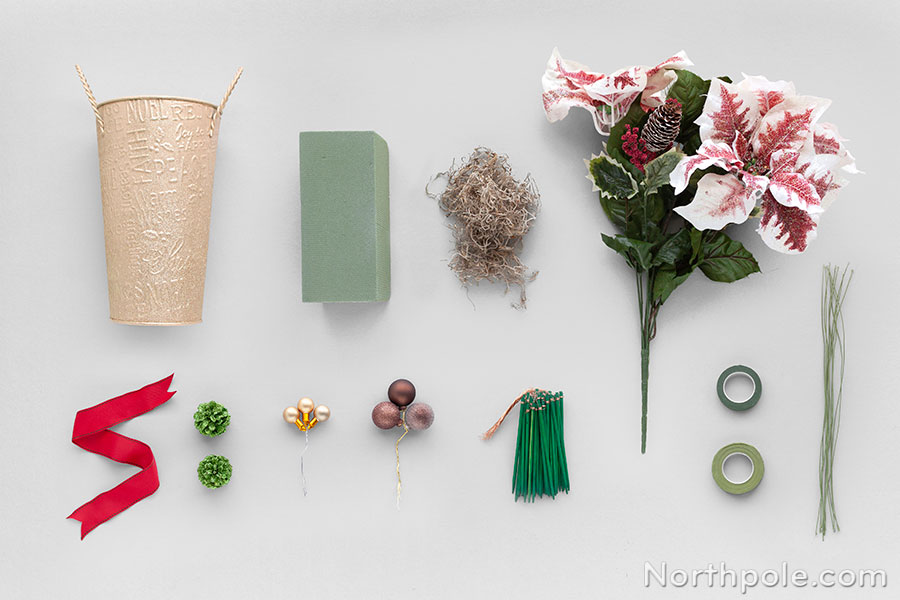
Container of your choice – You can use almost any vessel for your arrangement. Store-bought containers are fine and dandy, but don’t disregard what you may already have! Bowls, baskets, cups, or decorative buckets are all practical options.
Dry floral foam – Also called “desert foam,” dry floral foam is ideal for artificial flower arranging, as it is firmer than the wet floral foam used for fresh flowers.
Spanish moss – Moss is used to lightly cover the foam in the container, so the foam is not visible in the finished arrangement. In the floral industry, this is called “hiding the construction.”
Flowers & greenery of your choice – For most arrangements, you will need a mix of face flowers, linear flowers, filler flowers, and foliage. What are these? See the glossary below.
Wire – Useful for attaching embellishments to wooden picks, making bows, and much more, wire is a floral arranging staple. When shopping, you may feel a bit overwhelmed by the myriad of wire choices. If so, stick with our favorite: straight, coated wire in either 22- or 24-gauge.
Floratape® floral tape – This brand is hands-down the best floral tape out there, as it has the perfect combination of stretch and tack. Plus, it sticks to itself without making your hands too sticky or waxy.
Oasis waterproof floral tape – This tape is generally used for fresh floral arrangements, but the adhesive is so strong that it is useful for securing foam in containers for artificial flower designs, too.
Wooden picks – Picks are great for elongating floral stems or for adding “stems” to accents that don’t have them, such as ribbon, ornaments, pinecones, etc. Instead of buying wooden picks, you can use chopsticks, bamboo skewers, or stem clippings from artificial flowers.
Optional embellishments – Feel free to add embellishments such as ribbon, pinecones, ornaments, or other floral picks to complement the flowers in your arrangement.
Now that you’re familiar with the tools and supplies you’ll need, let’s discuss containers and flowers in more detail.
Select a Container
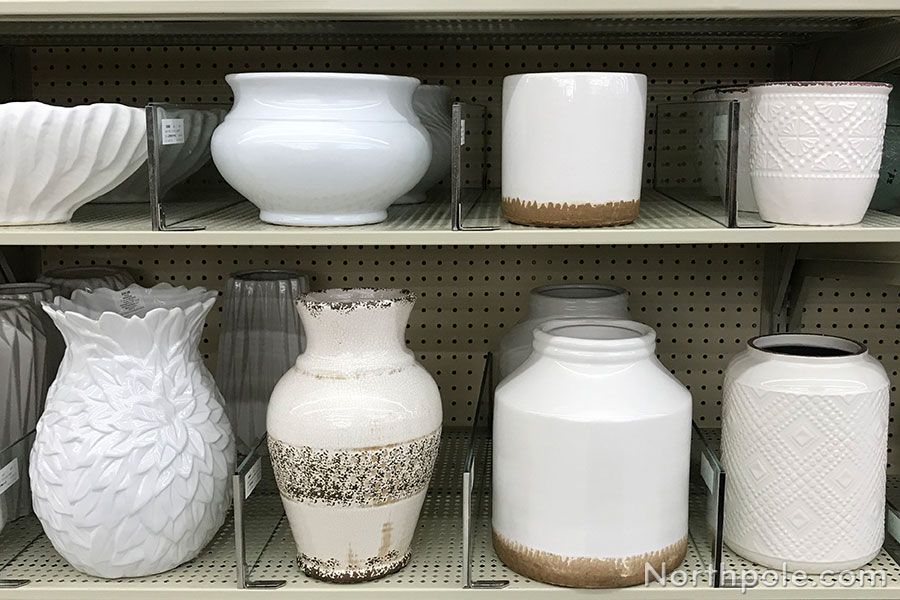
When choosing a container, first consider where the arrangement will be placed and if there are any size constraints. Depending on where the arrangement is going—in a foyer, on a dining table, or on a desk—you may want a container that is tall and slender, long and low, or small and compact. Assess the height, depth, and width of the space and jot down measurements, as they may come in handy when you are shopping at the craft store. (We like to take a tape measure with us on trips to the craft store.) Now it’s time to shop for flowers!
Select Your Flowers
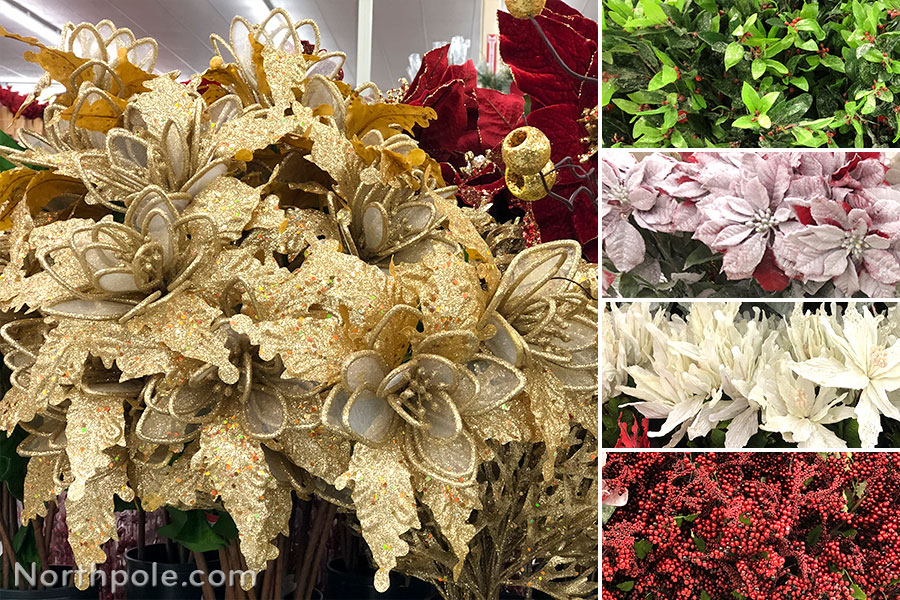
When you enter the floral aisle at the store, you may feel a tad overwhelmed by the glorious glittering garden of holiday flowers. If so, abandon those jitters and simply enjoy yourself as you walk through the aisles teeming with sparkling poinsettias, jolly holly, vibrant berries, and snow-frosted branches. If you don’t have specific flowers in mind, we suggest looking at everything once, then on your second loop around, start gathering your flowers and foliage. You’ll want to select flowers in varying sizes: large, full face flowers, as well as smaller filler flowers. As you collect your flowers, foliage, and accents, group everything together (like a bouquet) and hold it at arm’s length. We find that a little distance helps us see how the colors and shapes complement each other. If you’ve got more than you can hold in one hand, set the flowers in your cart and take a few steps back.
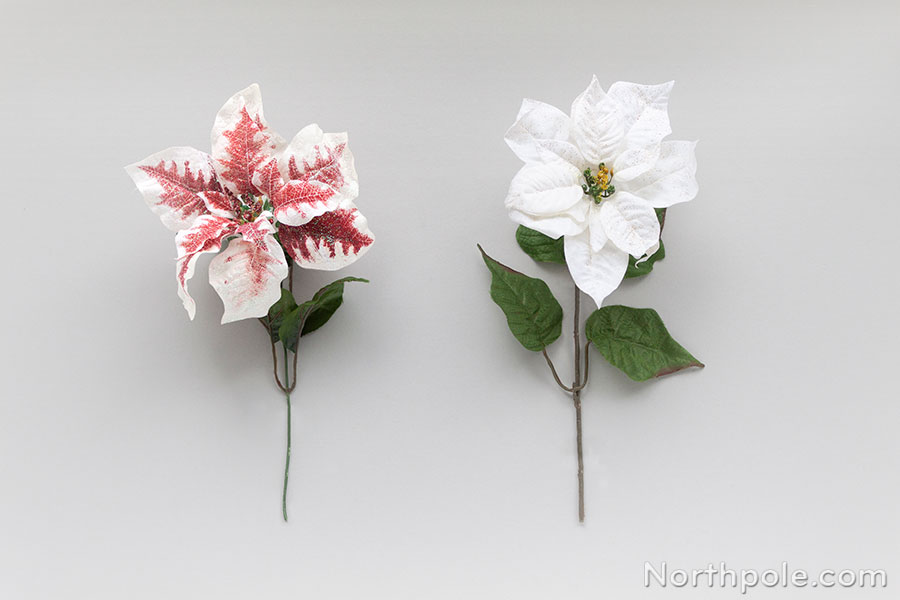
Face flowers – These are flowers with big blooms, such as poinsettias, lilies, large roses, hydrangeas, etc. Face flowers are the star of the show and should be the focal point of the arrangement.
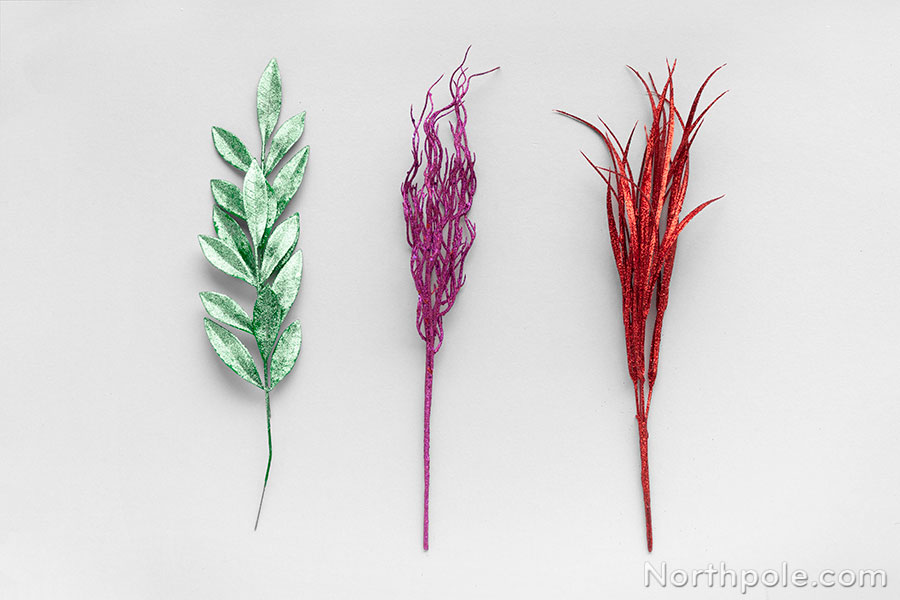
Linear foliage – Linear foliage is typically long, skinny, and sturdy, and it is useful for adding height and/or length to an arrangement. When looking for linear elements for your holiday arrangements, consider using wintery branches, festive foliage, or berry sprays.
Note: Flowers such as snapdragons, gladiolus, or delphinium are classic examples of linear flowers used in floral arranging. However, those examples are springtime flowers, so it’s unlikely you’ll find Christmassy versions of these flowers at the craft store.
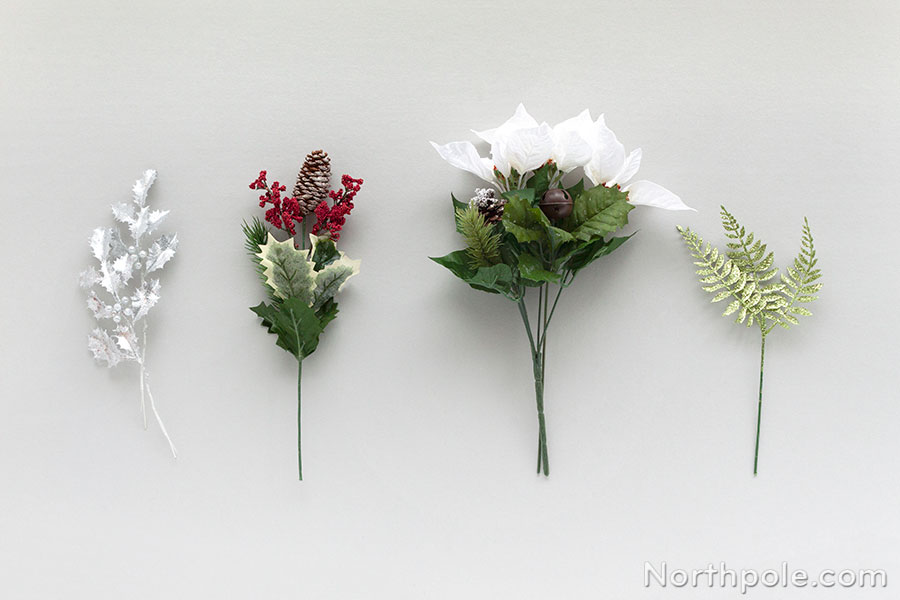
Filler flowers – As the name suggests, filler flowers fill in the gaps between the face flowers. Typically filler flowers have sprays of small flowers, such as daisies, asters, or baby’s breath. Depending on the flower selection at your local craft store, you can use the aforementioned flowers or something similar. But don’t limit yourself—berries, pinecones, or even greenery work well as fillers in holiday arrangements.
Arrange the Flowers
There is no one-size-fits-all approach to flower arranging, as there are so many factors that contribute to a floral design: the flowers, the container, your desired arrangement style, etc. Therefore, rather providing a step-by-step tutorial for a specific arrangement, we’ve provided some general guidelines below to help you get started.
Prep Your Workspace
Before you start arranging, set out all of your supplies, tools, and florals on your work surface. Remove any tags from the flowers and any packaging from the foam, wire, etc.
Prep the Container
To start, you will need to prep your container. Cut the foam to fit the container with about 1" of foam extending above the top. Don’t fuss too much with this step, as it’s not an exact science—simply make sure the foam is secure within the vessel. If the foam moves easily, your arrangement could topple out of the container. Here are a few suggestions to keep that from happening:
- Use hot glue to glue the foam inside the container.
- Wedge smaller pieces of foam between the walls of the container and the main block of foam.
- Criss-cross two pieces of Oasis waterproof tape over the foam, securing it in the container.
Add the Flowers
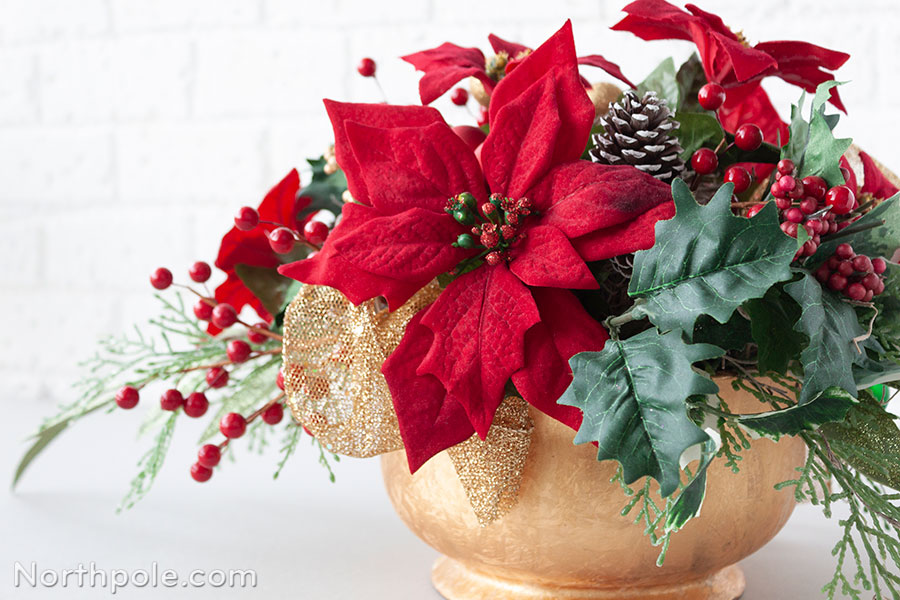
Loosely cover the foam with moss so that the foam will not be visible when the arrangement is complete. Now add your flowers. Trim stems as needed, then add a bit of hot glue to the bottom of each stem to help secure it in the foam. (This will prevent it from coming loose over time.) As you insert the stem into the foam, make sure at least an inch of the stem is in the foam. Start with your linear flowers and/or foliage to create the basic shape for your arrangement. Next add face flowers, placing larger ones near the center (or focal point of the arrangement) and smaller ones radiating out. In doing so, the arrangement will look pleasing, as this is how flowering plants look in nature. Finally, add any accents and fillers.
Ready to Start Crafting? Check Out Some Projects That Use This Technique: