Skill Level:
Crafting Time:
Category:
Share This Craft
Search Crafts
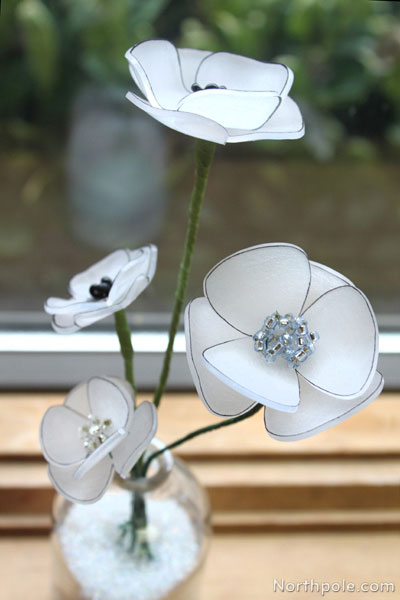
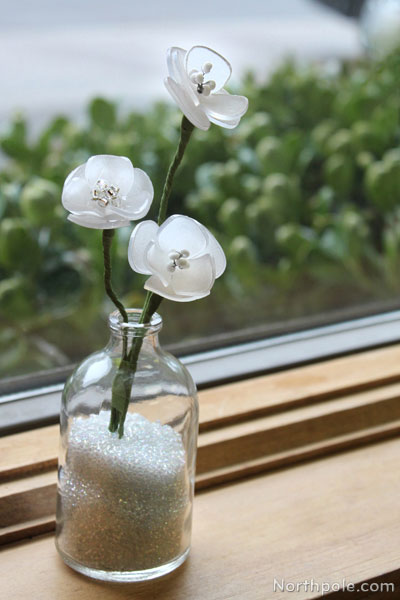
Ice Poppy Napkin Rings

If you’re wondering what on earth we used to make these precious, petite petals, we won’t hold you in suspense. It’s a blast from your past—Shrinky Dinks! This childhood craft material has gone chic. Use these beauties at your next winter-themed dinner party or give them as a hostess gift.
Supplies & Tools:

- Printable template (download here)
- Shrinky Dinks: Frosted Ruff N’ Ready
- Shrinky Dinks: Crystal Clear
- Fine tipped marker
- Scissors
- Paper to line baking sheet (and/or aluminum foil)
- Mini cupcake liners
- Spoon
- 32 gauge wire
- #6 seed beads, transparent with silver lining
- Cylindrical object that has a 1.25" diameter, such as a spool of thread or a prescription bottle.
- Jewelry glue (such as Aleene’s Jewelry & Metal Glue. Another reputable glue is E6000, but we are reluctant to try it because the numerous health warnings on the label.)
- Japanese hole punch, similar to this one (or cut a hole with an X-Acto)
- Cutting mat
- Ruler
- X-Acto
Directions:
Make the Petals:
- Print the template and cut out the pieces.
- Trace the flower outlines on the frosted Shrinky Dinks plastic. Be sure to mark the dots in the center.
- Cut out the flowers inside the lines. You don’t want to have unsightly lines on your finished flowers, so make sure you snip away all visible lines.
- Use the Japanese hole punch to punch out 1/8" holes where you marked the dots. If you don’t have a hole punch, cut a 1/8" hole with an X-Acto.
- Following the Shrinky Dinks’ instructions, preheat toaster oven to 325°F. Line baking sheet with a piece of paper. Shrinky Dinks recommends a brown paper bag, but use whatever you have. We used a piece of printer paper, and it worked just fine.
- Bake 1 flower piece at a time. Place cupcake liner on the baking sheet and place the inner flower on the cupcake liner. Place inside toaster oven and bake for 1–3 minutes. The flower will shrink and fall into the cupcake liner.
- Take the flower/cupcake liner out of the oven and immediately shape the flower. Use a spoon to poke the center (causing the petals to curl up), and then gently pinch each petal so that the edges curl in. Work quickly since the Shrinky Dinks harden rather fast.
Note: If the flowers harden and you don’t like how it looks, simply reheat it for 2–5 minutes until it softens and then reshape it.
- Now repeat step 6 for the outer petal. When you remove it from the oven, place the (now cool) inner petal in the outer petal and slightly curl the outer petals up. Make sure the petals are offset when you complete this step. It is important to make sure the outer petals are molded to the shape of the inner petals so that the pieces fit together when you assemble the flower.

Make the Stamens:
- Cut a piece of wire that is 12" long.
- About 3" from the end of the wire add a bead and fold wire over. Firmly hold the wire tails 3/8" from the bead in one hand and hold the bead in the other hand. Twist the bead until the wires are twisted together. The twisted part should only be 3/8" long.
- Add a bead to the longer bit of wire and then fold the wire so that the bead is less than 3/8" from the other stamen. Repeat the twisting action (as described in step 2) to secure the bead.

- Repeat step 3 for each additional bead. Make sure to vary the length of each stamen so that some are near the base of the cluster. We used 7 beads total.

Assemble the Flower:
- Poke the wire through the center hole of the inner petals.
- Separate the strands of wire. Feed one strand through one hole of the outer petal, and the other strand through the second hole.
Note: Near the ends of the wire, twist the ends so that the petals don’t fall off the wire.
- Place a small drop of glue under the stamens.
- Place a small drop of glue between the petals and pull the wire, nesting the stamen and the petals together. Make sure the petals are offset and nest together nicely.
- Turn the flower over and twist the wire securing the layers together.
Note: There may be some glue residue on the wire, so be careful not to glue your fingers together as you twist the wire. - Trim wire to 1/8" and fold wire so that it is flush with the back of the flower.

- Set aside and allow glue to dry.
Make the Napkin Ring:
- Working over cutting mat, measure and cut a 2" x 10" strip from the Crystal Clear Shrinky Dinks plastic.
- Bake the strip in the toaster oven for 1–3 minutes.
- When you take the strip out of the oven, immediately wrap it around a cylindrical object. (Get creative if you must—we used a plastic prescription bottle.)
Note: For this step, we like to heat the Shrinky Dinks on a piece of foil (not paper) because that makes wrapping the Shrinky Dinks around the bottle faster and easier. Make sure to keep a towel nearby to protect your hands from the heat.
Assemble the Pieces:
- When the glue on the flower is dry and the ring is cool, apply a small amount of glue on the back of the flower and attach it to the napkin ring.
- Hold the pieces together for a minute until the glue begins to set.
- Allow to dry completely.
- Now your lovely napkin ring is ready to use!

Ideas from the Elves:
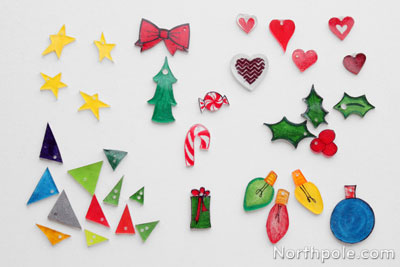
- Don’t throw away the scrap pieces of Shrinky Dinks! Turn them into little charms, buttons, or embellishments for other projects.
- Make an arrangement of ice poppies in a small bud vase. It’ll be perfect on a window sill, desk, or above the kitchen sink.
- Use different colored beads or draw an outline of the petals.