Skill Level:
Crafting Time:
Material(s):
Category:
Tag(s):
Share This Craft
Search Crafts
Washi Tape Twist Ties

Give your homemade food gifts, party favors, and holiday treats a festive touch with these washi tape twist ties. Using just 2 supplies—washi tape and wire—you can make these ties in a jiffy!
You may be asking, “What is washi tape?” It is a decorative masking tape that originated in Japan, made using washi (rice paper). Nowadays, you can find washi tape in superstores, office supply stores, and online. Our favorite brands of washi tape are Scotch and MT, as their designs are lovely, and the tape’s stickiness is elf-approved.
Supplies & Tools:

- Washi tape
- 28 gauge wire
- Scissors
Directions:
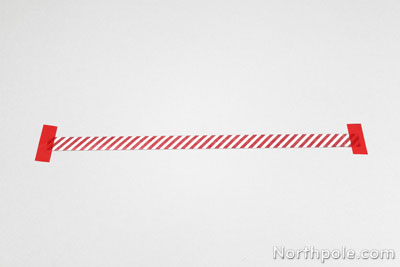
- Place a piece of washi tape on work surface, sticky side up. Sounds tricky, right? Not so! Simply tape down each end to keep it in place. We’ll call the solid red pieces shown below “anchors.”
- Cut a piece of wire that is the same length as your tape. (Ours is about 12".) Straighten the wire. The wire is a little unruly, so just try to straighten it as best you can.
- Now you will place the wire between two pieces of tape: the piece that is on the table and another piece that will go on top. We get the best results when working in small, 2–3" sections by laying down the wire, pressing down the top piece of washi tape, and repeating until the twist tie is complete.
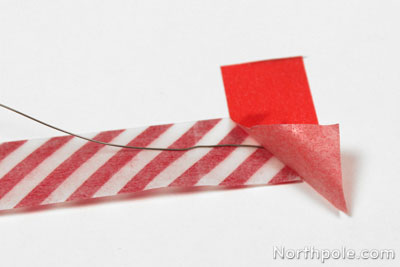
- To begin, place one end of the wire under the “anchor” tape. Then stick the wire along the center (lengthwise) of the washi tape.
- Place a second piece of washi tape on top, lining up the edges. At this point in the process, we find it’s easiest to leave this piece of washi tape attached to the roll.
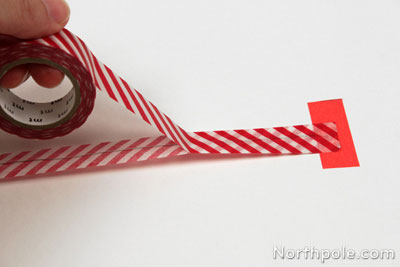
- Continue pressing down the wire and the top piece of tape until your twist tie is finished. Once done, cut the top piece of washi tape from the roll.
- To begin, place one end of the wire under the “anchor” tape. Then stick the wire along the center (lengthwise) of the washi tape.
- Lift your washi tape twist tie off your work surface and cut off the “anchors.”
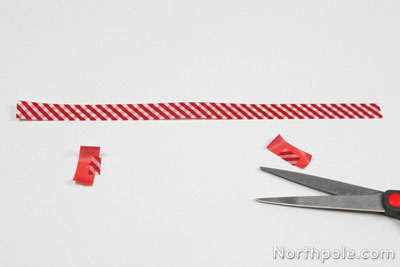
- Now you have some super fun twist ties!