Skill Level:
Crafting Time:
Material(s):
Category:
How To Felt Wool Sweaters for Craft Projects
Share This Craft
Search Crafts
How To Felt Wool Sweaters for Craft Projects

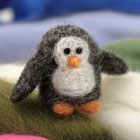
Why on earth would you want to purposely shrink your wool sweaters? Great question! After your sweater shrinks and becomes felt, you can cut it as you would fabric, and the sweater will not unravel. Because of this, your newly made felt can be cut into shapes for other projects, such as a pair of custom handmade mittens.
Wait a second—how does wool become felt? On a microscopic level, the fibers of wool are barbed and scaly. When wool has the right conditions—moisture, heat, and agitation—the barbs on the wool fibers entangle, causing the wool to shrink. The end result is a thicker, denser fabric—felt! Since the fibers are so close together, 100% wool felt is great for creating warm and cozy wearables, as felt blocks wind quite well.
Technically speaking, it is most accurate to say that you fulled your sweater, even though it is common to say you felted your sweater. Felting means that you create felt from raw wool fibers such as wool roving. Fulling means that you create felt out of something knitted or woven, such as a sweater. For simplicity’s sake, we’ll call it “felting” in this tutorial.
Supplies & Tools:

- 100% wool sweater*
- Pillowcase
- Heavy duty rubber band
- Jeans
- Access to a washing machine & dryer
*Thrift stores are great places to find inexpensive wool sweaters.
Directions:
- Put your sweater inside the pillowcase and close the pillowcase with the rubber band. If you are felting more than one sweater, put each sweater in its own pillowcase.
Note: The pillowcases will catch/contain the fibers shed by the sweaters. This will prevent damage to your machine since the fibers could clog it. This is also important if you are washing different colored sweaters, as you don’t want fibers from a black sweater to end up on a white sweater! - Place the pillowcases in the washing machine. Add jeans to the load. The jeans will increase agitation and will speed up the felting process.
Note: You can use towels instead of (or in addition to) jeans, but beware of lint! Sweaters will pick up lint from the towels, so always wash sweaters in a pillowcase. - Select the smallest load setting for the amount of sweaters/jeans in the machine. Use hot water to wash the load.
Note: Too much water will cause the sweater(s) to float, which will hinder the felting process. Less water means more agitation, so make sure you select an appropriate load size. - Add a very small amount of detergent—less than half of what you would normally use for that load size. While detergent is not necessary for the felting process, a little soap will help things along.
Note: Too much soap will prevent the felting process, so only use a little bit. - After the cycle is finished, remove sweaters from pillowcases. You can lay them flat to dry or place them in the dryer.
Note: Crafting in a jiffy? Dry your sweaters in the dryer on high heat, but know that this will continue the felting process. Therefore it is likely that you will get wrinkles in your garment. Sometimes you can remove wrinkles by spritzing the sweater with water and then pressing with an iron. To prevent getting wrinkles or creases, remove sweater from washer before the spin cycle, roll it between towels to remove excess water, and let it air dry. - Inspect your sweaters. If you can’t see the individual strands of yarn anymore, then it is felted. If your sweater shrank, but you can still see the strands of yarn, then it is partially felted. A partially felted sweater is fine for making mittens, but may not be suitable for other craft projects.
- If you want to felt the sweater further, run it through the washing machine again. Allow to dry.
Note: If you have a top-loading machine, you can check on the sweater before the spin cycle. If it still needs to be felted more, restart the wash cycle. - Use your new piece of felt to make whatever you like!
Click here to learn how to make a pair of mittens from your felted sweater.

Hungry for more felting goodness? Check out this Needle Felting 101 article.