


Skill Level:
Crafting Time:
Technique(s):
Material(s):
Category:
Tag(s):
Share This Craft
Search Crafts
Chompers the Shark

Duunn dun… Duunn dun… Duunn-dun-duunn-dun-duunn-dun… Ornaments beware—there’s a shark in your midst! Although his pearly white teeth look seriously sharp, Chompers is quite harmless. This fierce felt fishy is a perfect gift for young boys and shark lovers of all ages!
Supplies & Tools:

- Printable template (download here)
- Felt: dark blue, medium blue, white
- Scissors
- Embroidery needle
- Embroidery floss: dark blue and medium blue to match the felt
- Fabri-Tac®
- 4mm round beads: clear or black
- Straight pins
- Poly-Fil®
- String* or thin ribbon
*We used Silkon® #3 thread, a heavyweight nylon string that is typically used in jewelry making. It is designed to resist fraying and works well as a durable ornament hanger.
Directions:
- Print the template and cut out the pieces.
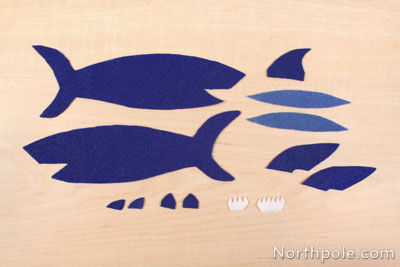
- Pin the template pieces onto felt and cut out in the colors listed below.
Cut 2 of each of the following:- Body — dark blue
- Belly — medium blue
- Fin B — dark blue
- Fin C — dark blue
- Fin D — dark blue
- Fin A — dark blue
- Upper teeth — white
- Lower teeth — white
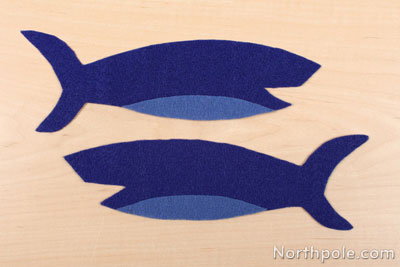
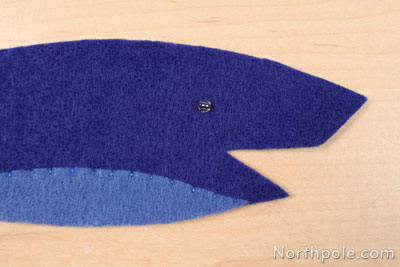
- Place a belly on each body piece, as shown below. You may also refer to page 2 of the template as a guide.
- Use a teensy bit of Fabri-Tac to glue the belly on each body piece. You want just enough glue to hold the belly in place while you sew it in the next step.
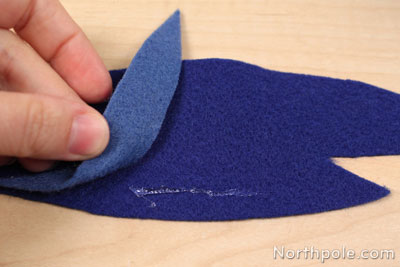
- Cut a length of medium blue embroidery floss and separate 2 strands. Sew along the upper arc of the belly. Repeat for the other body/belly piece.
Note: You don’t need to sew the lower arc of the belly right now; you’ll sew it later on in step 14.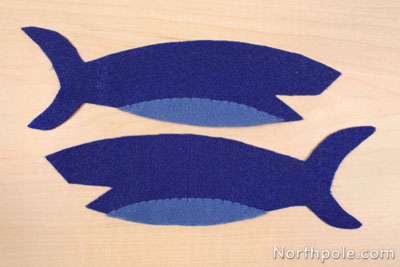
- Cut a length of dark blue embroidery floss and separate 2 strands. Sew a bead for the eye on each body piece.
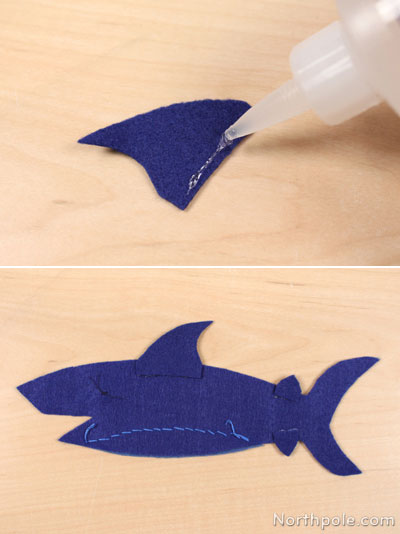
- Take one of the body pieces and flip it over so the wrong side is facing up. Glue Fin A and both Fin B’s onto the body with Fabri-Tac, as shown.
- Place both sets of teeth on the shark’s mouth and glue in place.
Note: To get a better view of the teeth’s placement, flip the body piece over and adjust the teeth as needed before gluing.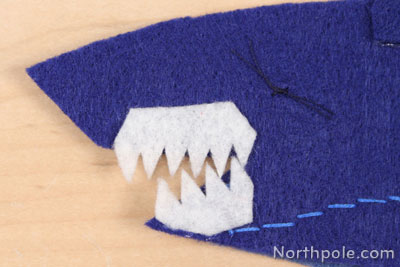
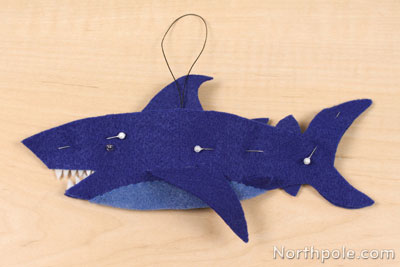
- Cut a piece of string that is about 8" long. Tie the ends in a knot and glue just below Fin A (the top fin). While the glue is still wet, place a small felt scrap on top of the knot to lock it in place.
- Flip the body piece over again so the right side of the shark (the side with the eye) is facing up.
- Take one Fin D piece and apply Fabri-Tac on the straight end of the fin. Quickly adhere the fin to the body above the belly, then hold in place until the glue dries. (Refer to page 2 of the template as a guide for fin placement, if necessary.) Repeat to add the remaining Fin D piece to the other body piece.
Note: Fabri-Tac dries very quickly, so you won’t need to hold it longer than a minute.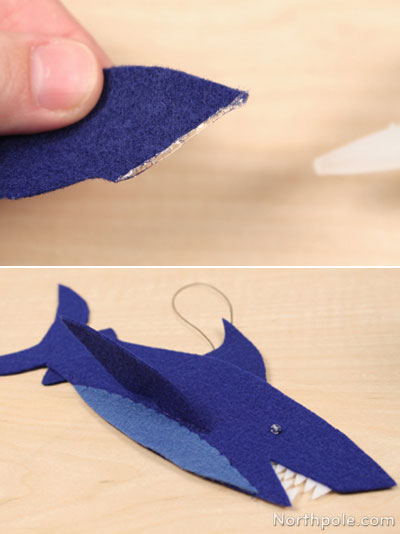
- Just as you glued both Fin D’s in step 11, glue one Fin C onto each body piece. Place the fin near the back of the belly, as shown below.

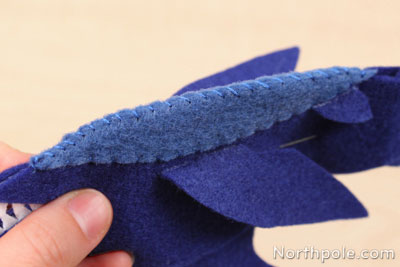
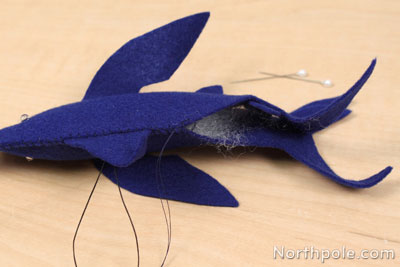
- Now stack the body pieces together, wrong sides facing each other. Use straight pins to hold the pieces together.
- With a 2-strand piece of medium blue embroidery floss, sew the 2 body pieces together along the belly only and then tie off the floss.
- Next, with a 2-strand piece of dark blue embroidery floss, begin sewing the remainder of the shark, starting at the belly’s edge, near the mouth. Continue to sew around the mouth and along top of the shark. After you sew through Fin A, pause to stuff the shark.
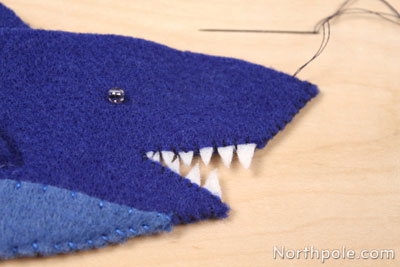
- Stop sewing for a moment so you can lightly stuff the shark with Poly-Fil. Remove the pins and stuff the shark.
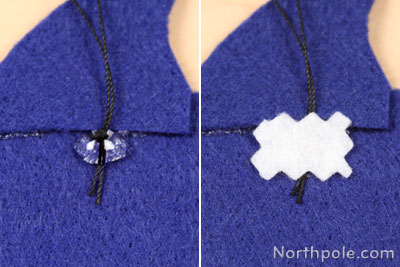
- Continue sewing until you’ve sewn all around the shark. Tie off the floss and hide the ends between the layers of felt. To do this, see here for more detailed instructions.
- Now Chompers is ready to swim to your Christmas tree!

Elfy Hint:
- Instead of cutting each tooth as directed above in step 2, use pinking shears to cut a straight line. This yields shorter teeth, making Chompers look a bit friendlier.


