Skill Level:
Crafting Time:
Technique(s):
Material(s):
Category:
Tag(s):
Share This Craft
Search Crafts
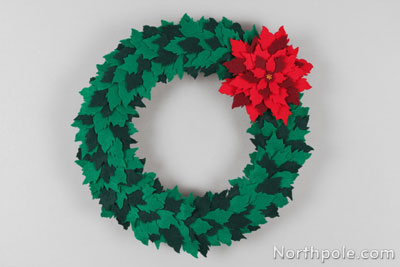
Tattered Poinsettia Wreath

Disclosure: This article is sponsored by Sizzix®. They provided us with the Sizzix machine and dies used in this craft. All words and opinions are our own. For our full disclosure, click here.
This pretty poinsettia wreath may look like a lot of work, but it is actually very easy to make! The secret is that all the leaves and petals are die‐cut using a Sizzix machine. Never heard of Sizzix? Well, get ready because Sizzix will revolutionize your crafting! A Sizzix machine is a portable device that, when used with an appropriate die, can cut through any material that you can cut with scissors. And why is it so awesome? Because you can die‐cut perfectly shaped flowers and leaves in a fraction of the time it would take to cut by hand. Since the Sizzix machine does all the hard work for you, all that‘s left for you to do is glue the pieces onto the wreath.
And, what‘s more, all the flowers and leaves are the same pattern, which means you only need one Sizzix die. By simply mixing shades of red and green felt, you‘ll give this project depth and draw attention to the pretty details of the tattered petals and foliage.
Supplies & Tools:

- Sizzix® Big Shot Plus Machine & included Cutting Pads*
- Sizzix Bigz Die – Tattered Poinsettia
- 0.33 yard natural colored cotton fabric
- 0.25 yard felt: red, burgundy, green, dark green
- Hot glue gun & glue sticks
- 12" beveled foam wreath
- Gold embroidery floss
- Embroidery needle
- 6" wire, 26 gauge
- 2 straight pins
*We used the Big Shot Plus machine, however, you can use the regular Big Shot machine to accomplish this craft.
Directions:
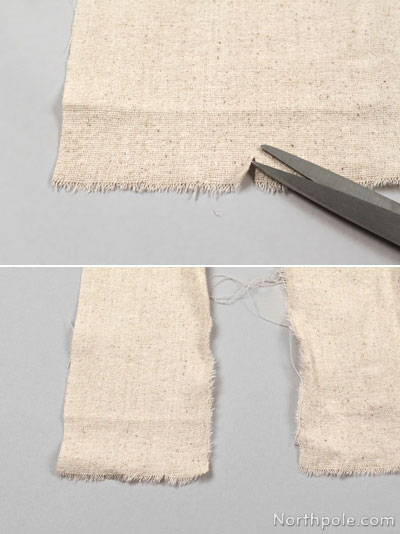
- Tear the fabric into strips that are 3" wide. To do this, snip the fabric on the selvage edge and then tear the fabric.
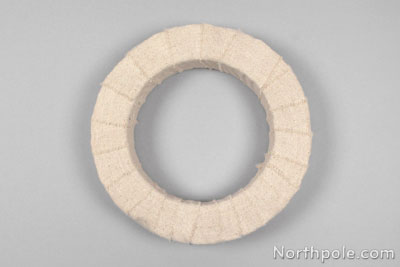
- Wrap the fabric strips around the wreath form, gluing as needed. Set aside.
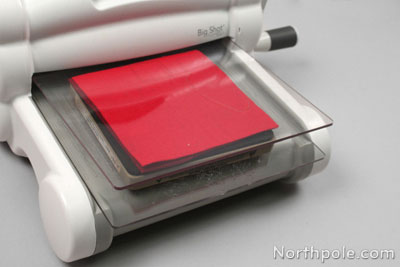
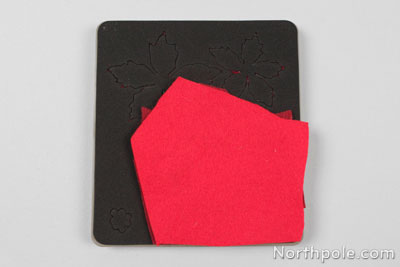
- Cut pieces of red and burgundy felt that cover the surface of the die.
- Place both pieces of felt on the die and then put between 2 cutting pads. Roll the “sandwich” through the Sizzix machine to die-cut the felt.
- Separate the die‐cut poinsettias from the scraps. Lay the felt scraps aside.
Note: Once in a while, the die may not completely cut the felt in some spots. No biggie! Simply snip the fuzzy bits with your scissors.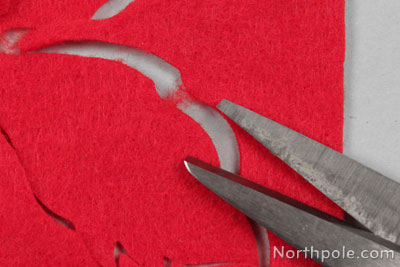
- Cut 4 additional pieces of red felt and 1 more piece of burgundy felt (or use your scraps!) to fit over only the large poinsettia on the die.
- Two felt pieces at a time, place the felt on the die, “sandwich” between two cutting pads, and run through the Sizzix machine. Separate the poinsettias from the scraps. In total, you will need:
- 1 tiny burgundy piece (looks like a cloud)
- 1 small red poinsettia
- 1 medium burgundy poinsettia
- 4 large red poinsettias
- 2 large burgundy poinsettias
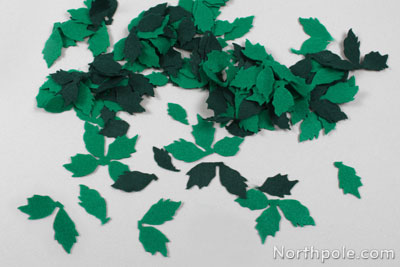
- Following the same method as above, now die‐cut 21 large green poinsettias and 15 large dark green poinsettias. (These will become the leaves.) Set aside.
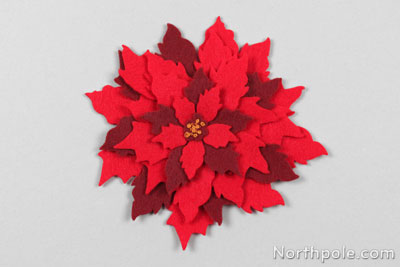
- To assemble the red poinsettia:
- Stack 2 large red poinsettias, 1 medium burgundy poinsettia, and one small red poinsettia. Glue between each layer.
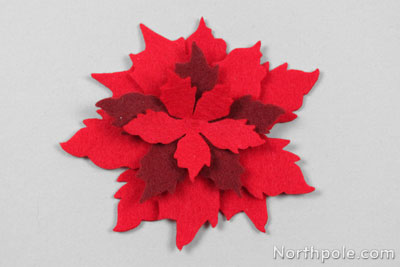
- Snip the remaining red and burgundy poinsettias to separate the petals. Glue the individual petals to the back of the poinsettia that you just made, alternating layers of red and burgundy petals. Your poinsettia should be grower wider with each additional layer.

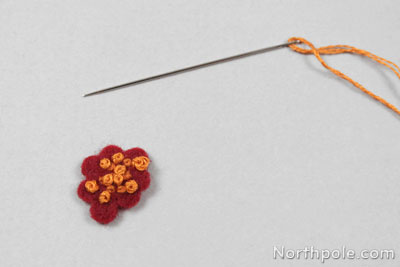
- Locate the tiny burgundy piece that looks like a cloud. Using gold embroidery floss, add French knots to look like stamen.
- Flip the big poinsettia back over, and then glue the stamen piece in the middle.
- Stack 2 large red poinsettias, 1 medium burgundy poinsettia, and one small red poinsettia. Glue between each layer.
- Snip the green and dark green poinsettias to separate the petals individually or into groups of 2 or 3. These are the leaves.
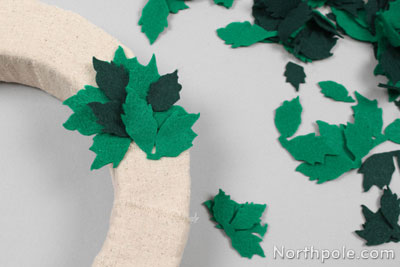
- Begin gluing the leaves on the wreath, layering them, and alternating green and dark green leaves.
- Once the leaves are glued down, attach the large poinsettia.
- Now attach the wreath hanger.
- Flip the wreath over.
- Wrap one end of the wire 3–4 times right below the head of a pin. Twist the remaining bit of wire around itself. Repeat to attach the other end of the wire to the other pin to make your hanger.
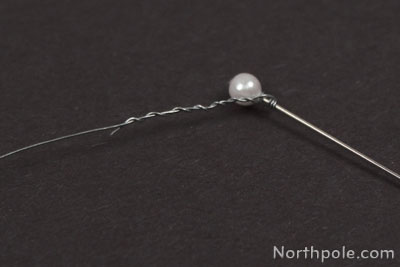
- Locate the top center of the wreath and stick the pins in the foam.
Note: Don‘t stick pins straight into the foam because they‘ll slide out when you hang your wreath. Instead, point the pin at an upward angle as you push it into the foam.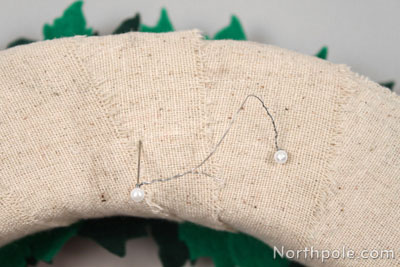
- Now your wreath is done… We told you that the Sizzix machine would make it easy!