Skill Level:
Crafting Time:
Technique(s):
Material(s):
Category:
Tissue Paper Snowflake Garland
Tag(s):
Share This Craft
Search Crafts
Tissue Paper Snowflake Garland

Disclosure: This article is sponsored by Sizzix®. They provided us with the Sizzix machine and dies used in this craft. All words and opinions are our own. For our full disclosure, click here.
Impress your friends with this intricate, handmade garland—they’ll never believe you actually made it! After creating this easy garland, you’ll want to whip up tissue paper garland all year long. Just swap out the Sizzix die and pick your favorite color of tissue paper to create any garland you want!
Supplies & Tools:

- Sizzix® Big Shot Plus Machine & included Cutting Pads*
- Sizzix Bigz Die – Snowflake #2
- Sizzix Bigz L Die – Stacked Snowflakes
- Tissue paper: white, shades of blue
- Ruler or a cutting mat with a grid
- Scissors
- Glue stick
*We used the Big Shot Plus machine, however, you can use the regular Big Shot machine to accomplish this craft.
Directions:
- Lay one sheet of tissue paper on your work surface with the short side facing you.
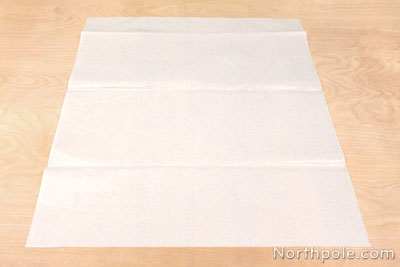
- Accordion-fold the tissue paper in increments slightly shorter than the length of the snowflake. To calculate this number:
- Measure the height of the snowflake on your die. For example, the Snowflake #2 die is 5".
- Subtract 3/8–1/2" from that length. This new length is going to be the width of the fold. You want your folded tissue paper to be shorter than the length of the snowflake—that way the snowflakes will be connected! For larger snowflakes like Snowflake #2, subtract 1/2". For smaller snowflakes like the Stacked Snowflakes die, subtract 3/8".
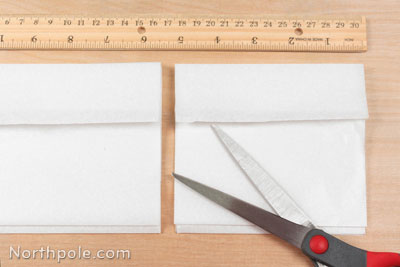
- Now cut the accordion into sections that are slightly wider than your die. To calculate this, you can:
- Measure the width of the snowflake on your die. The width of the Snowflake #2 die is 4.5".
- Add 0.5" to the width of your die, so for us that means we’re cutting our accordion into 5" sections.
- Carefully place one accordion piece over the die, making sure the folded sides are within the outline of the snowflake die. Remember, you don’t want to cut off the folded edges because that’s what keeps the snowflakes connected.
Note: To speed up this step, you can stack a couple accordion pieces together and die-cut them at the same time.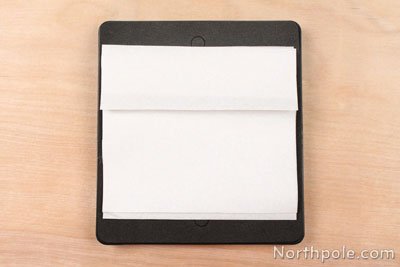
- Sandwich the die/paper between two cutting pads. When you place the cutting pad on top of the die, be very careful that you don’t move the paper.
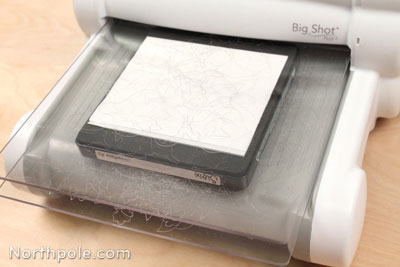
- Run the “sandwich” through the Sizzix machine. Pick up your snowflakes and discard the excess.

- Repeat steps 4–6 to die-cut all the accordion pieces of tissue paper.
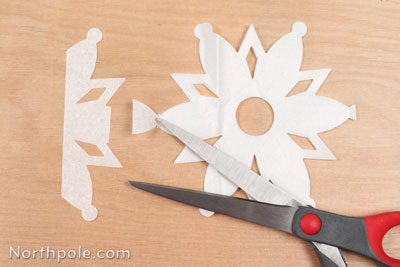
- Very carefully, unfold the snowflakes.
Note: If you are making the garland a few weeks in advance of your party, do not unfold the snowflakes. The snowflakes are very delicate and might get ruined if you open before you intend to use them. It’s also cumbersome to fold them back up, so it’s best to leave them folded until it is decorating time. - Trim any partial snowflakes at the ends, leaving a little tab to connect the strands together.
- Before you begin gluing the strands together, decide how long you want the garland to be. Since each individual strand is about 2 feet long, we recommend gluing 3–4 strands together to make a 6–8' garland.
Note: When using the Snowflake #2 die, you can die-cut 4 snowflake strands from one 20" x 24" sheet of tissue paper, and, when glued together, this will form one 8' garland. - To glue the snowflake strands together, overlap the tips and secure them with a bit of glue.
Note: Even if you left your snowflakes in folded stacks in step 8, you can still glue the ends of each strand together.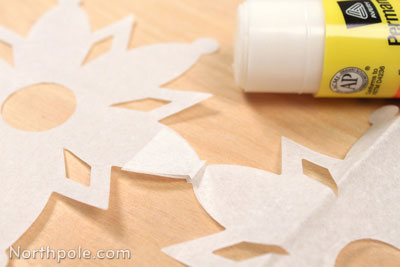
- Now a strand of garland is done! Repeat these steps to create additional strands in a variety of wintery hues using both the Snowflake #2 die and the Stacked Snowflake die. Then hang the garland wherever you like with a bit of tape.

Elfy Hints:
- Before you start folding the paper in step 1, iron the tissue paper to remove any crease lines. This will make it easier to accordion-fold the paper in step 2.
- If, when hanging your garland, you want the ends to be uneven, simply snip off snowflakes until you achieve the desired effect.

Idea from the Elves:
- Planning a holiday party? Use your snowflake garland as a backdrop in a photo booth!